3d Painting for a Reptile Cage
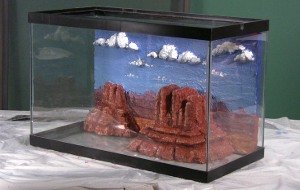
On this page I'll demonstrate how to create a 3d painting for your reptile cage or for living room painting ideas. This was intended for reptile habitats -as in a background for a reptile cage, but you could always create a 3d painting for one of the rooms in your house as a conversation piece.
The first thing I did was find pictures online of what I wanted to make into a painting. There are several sites online that have royalty free pics that you can use, or you can always create something from your imagination. For my canvas I used styrofoam, and built up the painting with styrofoam to make it 3d. On this project I used a hot wire from the Hot Wire Foam Factory. I also used their foam coat to cover the piece -which strengthens it and gives it a nice texture.
I measured the back of the reptile cage and used a piece that was a little too small, mainly so I could fit the finished product back into the cage at the end of the process (applying foam coat will enlarge the project by as much as a half inch).
Be sure to watch the video below on how to create a 3d painting
for a reptile cage.
Check out the Materials List video for everything you need to build these projects on this site!
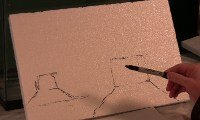
Next, I drew out a basic outline of the picture I wanted to create (with a magic marker). I decided which areas I wanted to be 3d and then built those areas outwardly so they protruded. To cut these pieces I used the hotwire I mentioned earlier (you can always just use a knife).
To glue these pieces in place I used Loctites Power Grab (low odor). The video above really makes this much easier to understand.
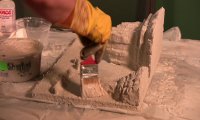
After everything was set in place I applied two layers of Foam Coat from the Hot Wire Foam Factory. When creating a 3d painting or bakground for a reptile cage you'll want to protect it by using a product such as foam coat.
Then I proceeded to paint it. I used acrylic paint in various colors to -in this case- create a south western scene of different rock formations. The texture from the foam coat creates some nice inconsistencies that provide a more realistic look to your 3d painting.
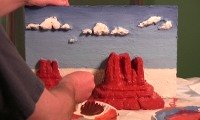
After painting, I sealled it with a non-toxic sealent called "Bounce" -again from the Hot Wire Foam Factory. If you're planning to use this in a reptile cage that has a high humidity environment, I would use an acrylic sealent such as Shields All -that's more water repelent.
Check out my FAQ page to see a list of materials I use. I applied 3 to 4 layers of non-toxic sealent and then let it dry for at least 48 hours.
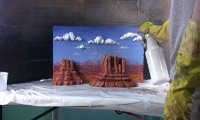
So there you have it. Try this online 3d painting out for your living room or for your reptile cage. This might be a good painting for kids to try out! Be sure and watch the video above on how to create your very own original work of art.


