|
How to build a castle
With this article and demonstrational video you'll learn how to build a castle for a pet lizard -or just for yourself.
This castle project is constructed with almost the exact same techniques as with all of the other fake rock landscape projects on this website. I would consider this model -a beginner leaning towards an intermediate skill level. Be sure to check out the other model Castle on this website. (Pictured below on right)It's a much more advanced skill level model, but it might be just what you're looking for. It can be found at this link: Build a medieval castle. 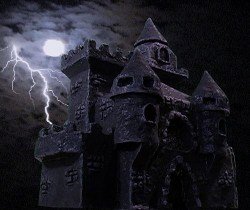
If you're needing a much more simplistic castle, check out this link: build a castle for school project Ideally, to get up close and personal you want to take a couple of British castle tours to see real castles and get an accurate sense of how they're designed. Not all of us can do that! One of the best things to do before you draw up your castle plans is to simply look at pictures of castles. Make some mental notes and paper ones about the various design qualities that you might want to incorporate in your build. Check out the Lizard store for fun lizard stuff! It's only a matter of time before you'll have to create a model volcano for a school project, check out the model volcano page and get a head start.
If you are trying to learn how to build a castle for a school project, a simple plan might be the best route depending on your deadline. If you're building one because you have a lizard for a pet (or a tarantula, snake -etc.), and want to create an interesting hide for them, then you might have more time; but you also have more things to consider -seeing as how a living creature is going to make this castle it's home. To give you a better idea, check out the demonstrational video below on how to build a castle.
The video is roughly 17 minutes in length, but it took me (off and on) about four weeks to finish.
This particular project centers around learning how to build a castle by constructing one using polystyrene (Styrofoam), grout, colored sand, a little bit of acrylic paint, regular glue or a product like liquid nails -and non-toxic sealant. 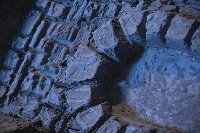
The use of grout (and sand) is key here, as it is grout that is giving your castle plans an extra realistic look. Grout will make your castle look as if it's actually made out of brick and mortar. Depending on how much detail you put into it, you can achieve a very authentic look- that of an old weathered stone castle. The first thing you want to take into consideration when learning how to build a castle is how big you want the structure to be. The many layers of grout will increase the weight- dramatically and the size- slightly. You might also think about sketching out a rough plan on paper as to how you think it will eventually look.
You will need support beams (pieces) to hold up horizontal
pieces as you glue them in place.
With a normal glue you will either have to wait, or hold pieces together and wait, depending on certain gravity situations. 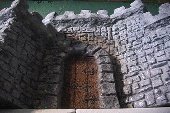
Next, you need to decide if your castle is going to have a second level. If you have a lizard for a pet, a second level will provide a potential basking spot and a sizable hide underneath. It also encourages some climbing exercise possibilities. This is definitely a stage in which to refer
to the video above detailing how to build a castle, as seeing it with a voice-over might make it
much clearer.
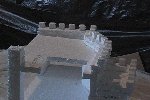
Now, there are some additional things you want to take into consideration when learning how to build a castle. One is to try to incorporate some merlons. What's a merlon? It's the solid part of a battlement.(The Sawtooth design, usually lining the top edges of certain parts of a castle) The openings,
or spaces between, are called crenels.
The battlement, having solid and open sections, provided cover and shooting potential to defend against an attack on a castle. The other rather important aspect to include in your design -is to make it the color gray. Obviously there have been castles that were not gray, but most people would associate castles with the color gray. In the video above on how to build a castle, I use a grout that is pre-mixed to be the color gray. 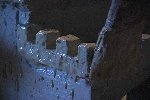
Once you have all of your pieces glued together you need to apply at least three layers of grout. I use the non-sanded type. Can you use sanded grout? Of course you can, non-sanded is just easier to thin for the initial coat. Non-sanded grout will also help you in keeping much of your
original detail in the polystyrene sculpt. With each batch of grout I always start off with a little bit too much water, then add small amounts of grout to get the desired thickness.
I always put at least three layers of grout -preferably four.
Both of these uses of paint were optional, having said that -one could completely construct this castle without the use of any paint. To add shading or color variation I chose to use colored sand. 
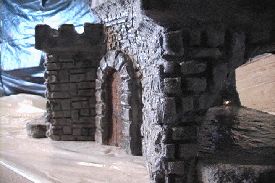
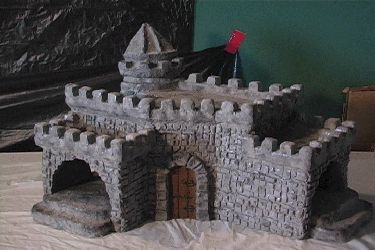
What I ended up doing to make a realistic brick pattern was to create a mold-like stencil. Although it was neither a mold or a stencil, but more of a way of applying a texture to thick grout. I used a product called "Sculpey". This product allows you to fire it (permanently harden it) in your own home oven. What I did was make sure it had at least a quarter inch thickness, then I carved an old style brick pattern into it. After applying very thick grout to a certain section of the structure, I let the grout dry for around 40 minutes. Then, using the brick pattern device I had made, I pressed the pattern into the thick grout. This is yet another stage where watching the video- how to build a castle would help a great deal in understanding this process. The door was colored by the use of brown sand. To add detail to the door I used some black acrylic paint, incorporating some lines to indicate boards, a doorknob and some large medieval looking hinges. 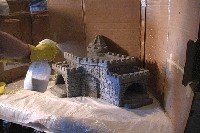
For those of you who have a lizard for a pet, or some other living creature, and you intend this castle to be its home; you'll need to seal it using a 100% non-toxic sealer. For this particular project I used a non-toxic acrylic sealer called "Shields All". It's a sealant that has a very good water repellent quality (non-toxic acrylic sealers can be used for wet and dry environment lizards). You'll want to choose a sealant that's water repellent if you have a high humidity lizard. I've also used a sealer called "Mod Podge", which is more appropriate for dry environment lizards such as a bearded dragon or uromastyx. In fact the Complex fake rock wall featured on this site was sealed with Mod Podge. Even for those making this castle just because you've always wanted to make a castle, it's probably still a good idea to seal it. It will extend the life of the structure, preventing some wear and tear, making it more durable. Grout tends to smudge off a little on your fingers if you don't seal it. While visiting a real castle, you might find it to be rather dusty and fragile; we don't want that much realism here! I applied five coats of the non-toxic acrylic sealer, and what I did when applying the last coat -was sprinkle some gray colored sand on the structure. This did two things, one of which was to eliminate 90% of the shine created by the sealant. The other was to provide some traction for if you have a lizard for a pet. The sand sticks to the sealant, and after letting it dry, you'll want to take a brush and whisk off the excess. 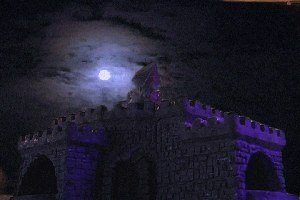
I also added a little bit of very dark gray sand which helped put in some detail, and make the castle look old and weathered. You can also incorporate some green sand to resemble moss which aids in the aged look, this can be seen in the Mayan temple I did. Be sure and check out the video above on how to build a castle, as it will hopefully give you ideas on how to make your castle plans efficient -and fun! Don't forget to stop by the Lizard store for lizard fun stuff!
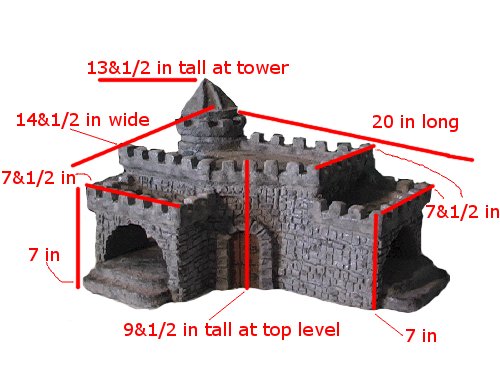
Castle measurements: I get a lot of emails asking me the dimensions of this basic castle. Below is a picture detailing the measurements of the finished castle. You need to take into consideration the fact that the grout adds around an 1/8 inch to 1/4 inch to the Styrofoam sculpt. So the original Styrofoam sculpt was slightly smaller than the measurements you see below. At its tallest (at that tower) its 13 1/2 inches tall. At the longest its 20 inches long, its width is 14 1/2 inches. The tallest platform is 9 1/2 inches tall. The little front platform entranceways (with the arch) are 7 inches tall by 7 inches wide.
Have A Great Story About This Topic?Do you have a great story about building a castle? Share it! What Other Visitors Have SaidClick below to see contributions from other visitors to this page...
Fantastic Castle for "N Gauge" Railway
Not as easy as it seems!
Medieval Castle Building Not rated yet
Fantasy castle Not rated yet
Edible model castle Not rated yet
Building a castle on a rainy day. Not rated yet |


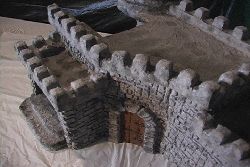 The benefit to using polystyrene (Styrofoam) is that it's somewhat easy to cut, it has a mass to it
-meaning a thickness structurally that can be built up, unlike paper. And it's obvious benefit is
it has a mass without a heavy weight associated with it.
After drawing up your castle plans, you will want to measure and draw a basic floor plan
on a sheet of polystyrene. After cutting that out, you'll need to measure for height
and cut and glue pieces accordingly.
 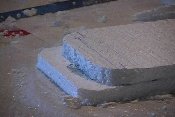 This entire project could be glued together with just a normal glue such as Mod Podge.
The benefit (as the above video shows) to using a product such as liquid nails is that
it will bond faster thus enabling you to progress at a much faster pace.
  If you are creating a second level, you need to provide a way for a pet to climb the structure.
Creating shorter towers in front could do the trick, but you might want to think about
putting in a trap door-like staircase. This is an area where a stronger glue might come in handy.
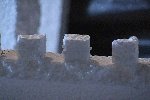 Throwing some merlons and crenels into your castle plans
is probably one of the most if not the most important step in creating a structure
that someone would recognize as a being a castle.
 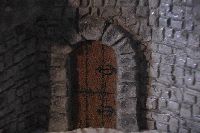 For the last coat of grout I mixed in some black acrylic paint
to slightly darken the gray. I also used some acrylic black paint to add detail to
the wooden door.