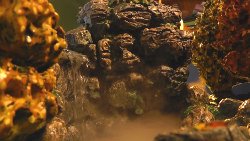
Autumn waterfall model

On this webpage I'll describe how to make an autumn themed waterfall model as a tabletop -or potentially a terrarium waterfall.
***I can no longer recommend building this for a living creature. The steps involved to make sure it's safe can be quite challenging and might wind up being a danger to a pet. I have NOT made one of these for a living creature, so even though the sealants (non-toxic) and process was designed for safety, it may potentially be unsafe. I can only recommend building this for recreation and not for a pet.
If you do decide to build this for a pet you should research whether or not a waterfall would be appropriate for the pet you have. A lot of times it can be a danger to a pet. Even if the pet you have is comfortable around water, you need to make sure the PH of the water is where it should be concerning the type of pet you have. Also, the water needs to be dechlorinated, -follow the steps to make sure the water is tested and safe. Water should be changed at least every other day. With this type of process -leaks can happen and if you haven't sealed it correctly -it can be hazardous to a pet's health. Your pet's safety should be your biggest concern, the best route might be buying one from the pet store.
The techniques to this project are very similar to the other structures on this website. This might be more accurately described as a tabletop waterfall.
This waterfall is equipped with a waterfall pump that has a filtration system built into it.
 |
Be sure to check out the video below on how to make this autumn themed waterfall model, it has a full voice over that describes every step in creating this structure.One of the first things I do is research images on the net. |
A great place to go is morguefile.com. This site has images that are for inspiration, meaning you can't use them as a stand alone, but you can get ideas for what waterfall designs you want to put into your waterfall project.
Check out the Materials List video, -scroll down (on that page) to watch the video explain the supplies needed.I usually start out with a basic drawing of what I think it will look like. I then measure out what I think the size of the structure will be. I will then proceed to cut out the beginning pieces of the base using polystyrene (foam) as my material for building up size. Lately with these projects I've been using a couple of hotwires from the hot wire foam factory. Using a hotwire is not necessary, but it makes the process much much easier! The other benefit of the hotwires is the clean up; using a knife to cut the foam is a rather messy experience.
__________________________________________________________
|
Next, I'll glue together the foam pieces, arranging them in the order of my waterfall designs. Be sure and watch the video above on how to make an autumn themed waterfall model. |
 |
The entire time I'm piecing everything together, I'll check to make sure the waterfall pump is going to fit with enough room to compensate for the added foam coat strengthening layers.
Once I glue everything together, I proceed to cover the structure with foam coat, which is also from the hotwire foam factory. Foam coat is a covering, like grout, that strengthens the structure and will hopefully extend the life of the waterfall.
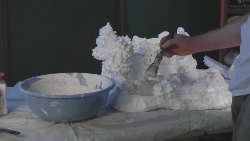 |
I put only one good layer of foam coat on, but the more layers you apply, the stronger it will be. Another product I used from the Hot wire foam factory is "Bounce". |
|
For the waterfall pump/filtration system I used the Tetra Repto filter 90gph that's pictured left. This pump is meant for up to 20 gallons, but there should be an option to select a 125gph on that same page that should provide cleaning for up to 55 gallons of water. This pump features a filtration system that (combined with changing out the water often) should keep the water much cleaner than a pump without filtration. |
Bounce is a covering that will also improve the durability of the project, mainly making it more impact resistant.After the foam coat/bounce is applied I paint it with what I call the poor man's paint gun. Watch this in action with the video above on how to make this waterfall model.
|
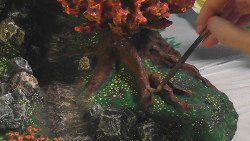
Next, I apply fine detail painting -using acrylic paint. This is another area where it's good to refer to the pics you may have researched about various waterfall designs. The process of getting the right colors to convey the autumn look was rather tedious, but if you apply several layers (not covering up the last layer entirely) of fall- |
 |
 |
like colors the look will hopefully start to look more realistic. After the paint dries, you will want to seal it with a non-toxic sealant -at least four layers. I used a product called Delta creative by Ceramcoat. |
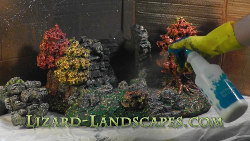
When making a project with a waterfall pump you'll have to seal all of the areas that are going to be covered with water with aquarium grade silicone -just one good layer. This will ensure that the waterfall model will be waterproof. With the last step, I sprinkled fine grain sand on the areas where the two pieces come into contact with each other (watch the video above). This is done to ensure that the two pieces do not stick together because of the tackiness of the sealer. When researching waterfall designs be sure and study this and other waterfalls on this site to better prepare for the construction of your own unique waterfall model!
