How to build an indoor
tabletop waterfall
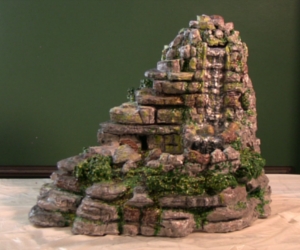
On this webpage I'll show you how to build an indoor waterfall or tabletop waterfall -also called a tabletop water fountain.There are other waterfall models on this site that are more appropriate for a living critter to have in it's cage.
Those waterfalls have a filtration system incorporated into the water pump. This waterfall features a water pump that has no filtration system. If you're making this for a living creature, I would advise using a water pump with a good filter -it will be more sanitary and it will make your life easier as far as the clean up goes.
Be sure to check out the video below on how to build an indoor tabletop waterfall. You could always build this for outdoor use, say in a garden or for a patio. If you are building this for outdoors I would advise using more layers of foam coat or grout in order to make the structure stronger. I would also bring the waterfall indoors during the winter, or get some sort of cover to protect it!
 |
The first thing I did was try to get inspiration by looking at pictures of waterfall scenery on a site such as morguefile.com. |
|
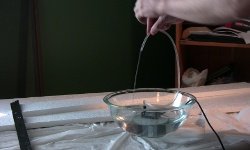
I started out with a glass bowl and a waterpump that had a tube that reached around 20 inches tall. I then went about the process of wrapping polystyrene (styrofoam) around the bowl and cord and tubing in order to camouflage the guts of the indoor waterfall. |
 |
Check out the Materials List video for everything you need to build these projects on this site!
During this process I used a tool called a hotwire from the Hot Wire Foam Factory. It has the ability to cut through EPS foam with ease and precision -the video on how to sculpt this waterfall scenery (on this page) shows this technique better than I can write about it.
One thing I incorporated is a level -to ensure that the waterfall model actually functioned properly. You don't want to spend a lot of time on a project and then have the final result -<i>not work</i>. A good level will make sure everything is flowing the way it should according to your waterfall plan.
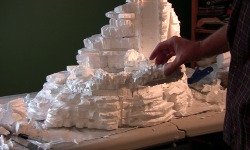 |
Once I got the sculpting of the polystyrene done I applied one good layer of foam coat from the |
With this indoor waterfall I only applied one layer of foam coat, with grout I would have had to apply at least two layers. If you're making this tabletop water fountain for a living creature, you'll want to apply two or three layers for strength -especially if you have a Chinese water dragon.
|
Next, I moved on to the painting stage. First, I covered the entire project in a light grey acrylic using white and black paint mixed with water. I then mixed all three in a water bottle I got at a dollar store. The video above on how to create an indoor waterfall shows the entire process with a voice over. |
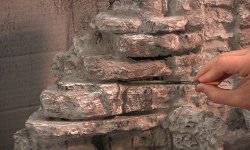 |
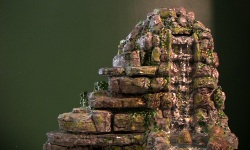
It's very important to get inspiration for the painting of the waterfall scenery. It almost always comes down to the paint job -in making a convincing realistic landscape sculpture. Looking at waterfall photos will help inspire you to go in different directions. After all, you are creating a living waterfall instead of just a static sculpture or painting -this will have real flowing water cascading in and around the structure.
 |
After the painting, I proceeded to seal it. I used "Shields All" -a non-toxic acrylic sealant to apply several layers to the project. The sealant will make it last longer and strengthen the waterfall model. On the areas that water will be flowing 24/7, I applied aquarium grade silicone. |
This stage will ensure that you wont have any leaks or erosion over time. I let the structure dry or cure for roughly three days, -and I let it dry outside. Silicone is quite toxic when wet, but after it's dried it's food safe. You want to get the silcone that say aquarium grade and food safe.
Then I like to sprinkle fine grade colored sand on some of the structure to add a little bit of texture and help reduce the shiny finish that the sealant leaves behind.
Be sure to watch the video above on how to build this indoor waterfall!
